In this post I want to show how I build a simple Telegram bot using serverless functions and using a tool that helped me to develop and test everything locally. I have never built a Telegram bot before, nor have I developed anything serverless or programmed in JS, so it is done by and for beginners. But first, some concepts.
What is Serverless?
Serverless computing (or serverless for short), is an execution model where the cloud provider (AWS, Azure, GCP, …) is responsible for executing a piece of code by dynamically allocating the resources. And only charging for the amount of resources used to run the code. The code is typically run inside stateless containers that can be triggered by a variety of events including http requests, database events, queuing services, monitoring alerts, file uploads, scheduled events (cron jobs), etc. The code that is sent to the cloud provider for execution is usually in the form of a function.
What is Serverless Framework?
The Serverless Framework consists of an open source CLI that makes it easy to develop, deploy and test serverless apps across different cloud providers, as well as a hosted Dashboard that includes features designed to further simplify serverless development, deployment, and testing, and enable you to easily secure and monitor your serverless apps.
Project Requirements
Lets begin building our Telegram bot. For that we’ll need:
Serverless CLI
This is the tool that will help us with the development, test and future deployment of our serverless project. If you want to have it globally installed just run:
npm install -g serverless
Ngrok
Ngrok allows you to expose a web server running on our local machine to the internet. We just need to tell ngrok what port our web server is listening on.
When you start ngrok, it will display in your terminal the public URL of your tunnel and other status and metrics information about connections made over your tunnel. We will see an example later. First let’s install it, just go here and follow the instructions.
Telegram Bot
Just talk to BotFather (find him in Telegram App) and follow a few simple steps to create a new bot. Once you’ve created a bot and received your authorization token (save it for later) we can go to our next step. For more info about telegram bots check the docs.
Putting it all together
First, lets create a node project. For that just create a folder for the project and once inside run:
npm init
Follow the steps and when it ask you for an entry point put handler.js.
Now, let’s install our dependencies. First, Serverless CLI:
npm install -D serverless serverless-offline
And now Telegraf, a Telegram library that will help us interacting with our bot:
npm install --save telegraf
At this point you should have a package.json with something like this at the end:
{
...
  "devDependencies": {
    "serverless": "^1.60.4",
    "serverless-offline": "^5.12.1"
  },
  "dependencies": {
    "telegraf": "^3.34.1"
  }
}
Now, let’s create our serverless descriptor. For that just create a file named serverless.yml and put this:
service: telegram-bot

plugins:
  - serverless-offline
provider:
  name: aws
  runtime: nodejs12.x
  stage: dev
  region: us-east-1
  environment:
    TELEGRAM_TOKEN: ${env:TELEGRAM_TOKEN}

functions:
  find:
    handler: handler.find
    events:
      - http:
          path: find
          method: post
          cors: true
This file describes to Serverless CLI everything it needs to know to deploy our function. We could easily add more functions to this file and that will allow us to deploy more than one function with just one command.
Finally, let’s add the code of our functions. Create a file called handler.js and add this code:
'use strict';

module.exports.find = async event => {
const Telegraf = require('telegraf')
const bot = new Telegraf(process.env.TELEGRAM_TOKEN)

bot.command('oldschool', (ctx) => ctx.reply('Hello'))
bot.command('modern', ({ reply }) => reply('Yo'))
bot.command('hipster', Telegraf.reply('λ'))

bot.launch();
};
Make it work!
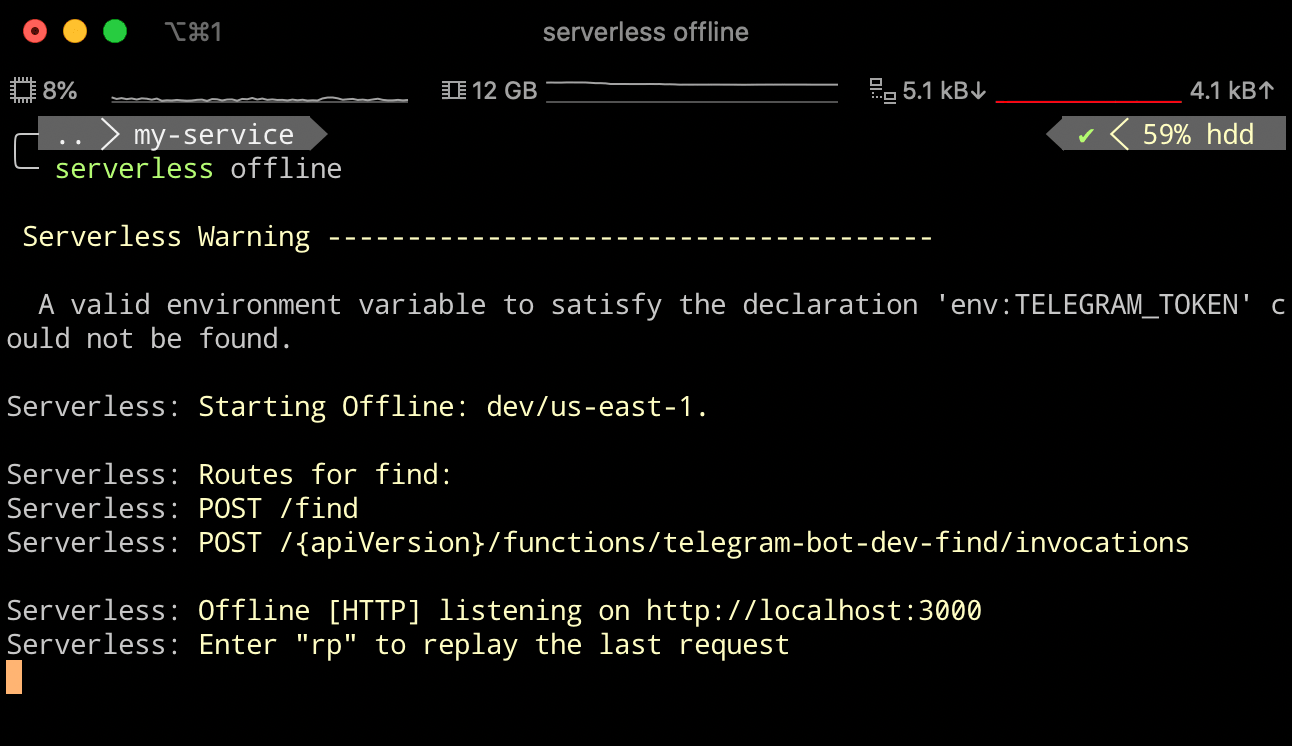
Lets run everything! First, lets put our telegram token in our environment, for that just run:
export TELEGRAM_TOKEN=<YOUR_TOKEN>
To run our function locally we need to execute:
serverless offline
That command will list all the functions deployed with the corresponding path. We’ll have a server listening for our request in localhost over the port 3000 and with a route for the find function.
Now, lets expose this to the internet so our Telegram Bot can make calls to our function. For that we’ll use Ngrok. Just execute:
ngrok http 3000
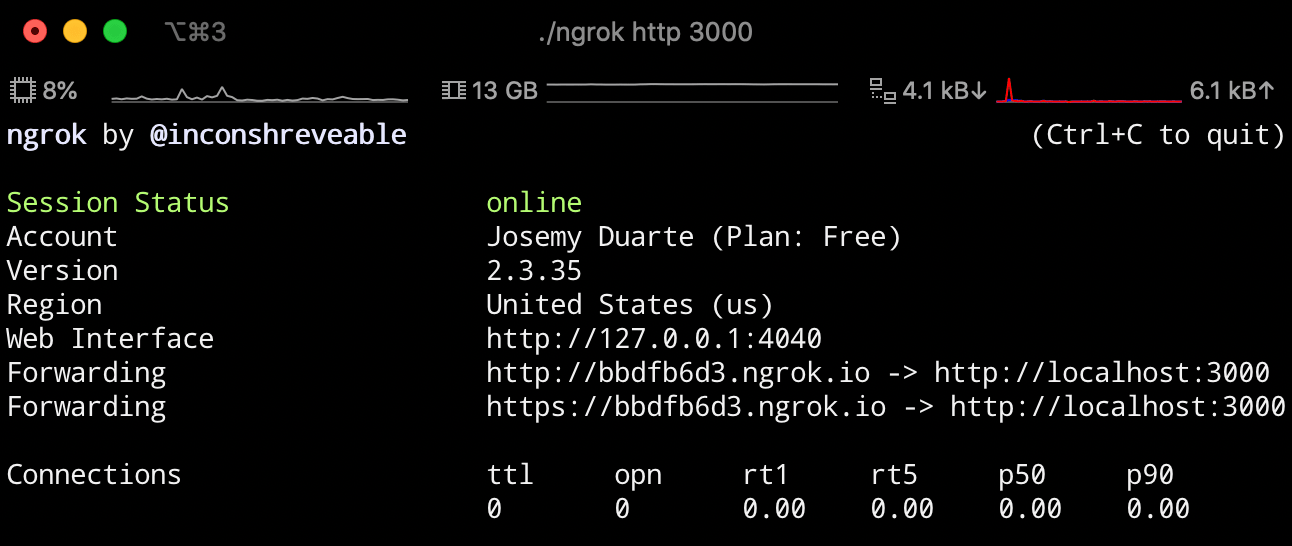
We will take the HTTPS url that it gives us (it’s different for every execution) in this case https://bbdfb6d3.ngrok.io and our Telegram Bot Token and we will make a request to the following URL to set the Webhook URL for the Telegram bot:
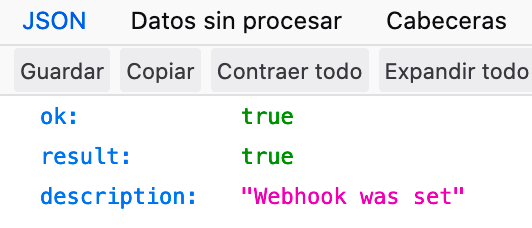
https://api.telegram.org/bot[TELEGRAM_BOT_TOKEN]/setWebhook?url=[NGROK_URL]/find
It’s important to use the HTTPS version of the URL, without encryption Telegram won’t accept it. And if we get a screen like this, we know everything went well:
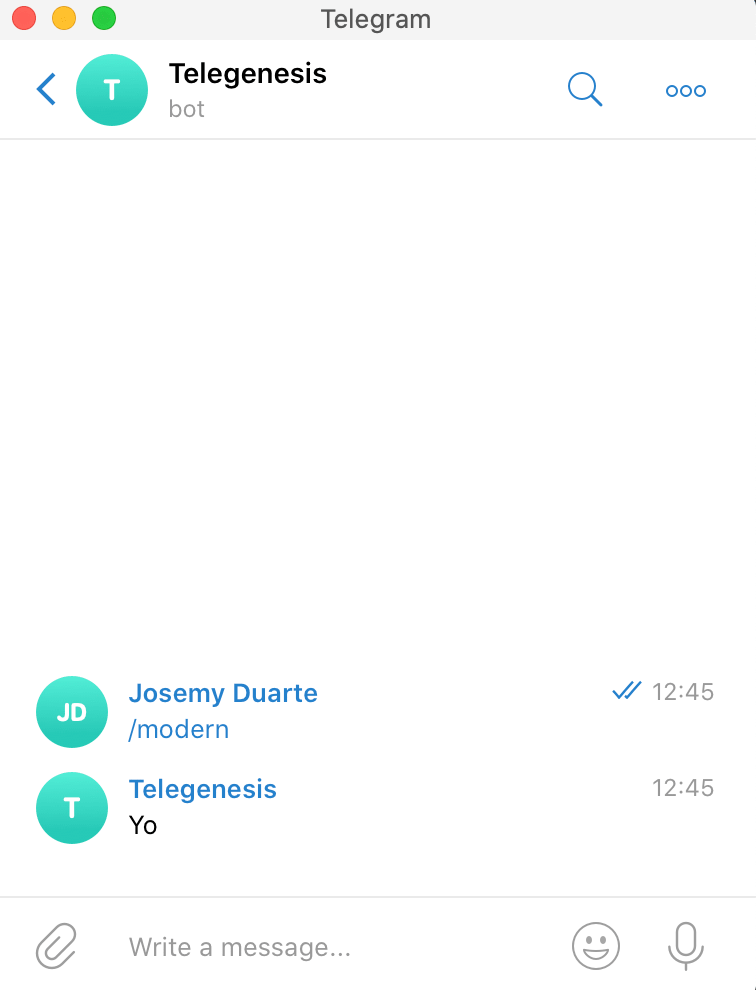
And now we can speak to our bot with everything running in our machine.
Deploying to AWS
One of the perks of Serverless CLI is that now with just one command we can go from having everything in our machine to deploying everything to our cloud provider. Our serverless.yml has as provider AWS, so for this example we will deploy it there, but it would be painless to change it to GCP or Azure.
serverless deploy
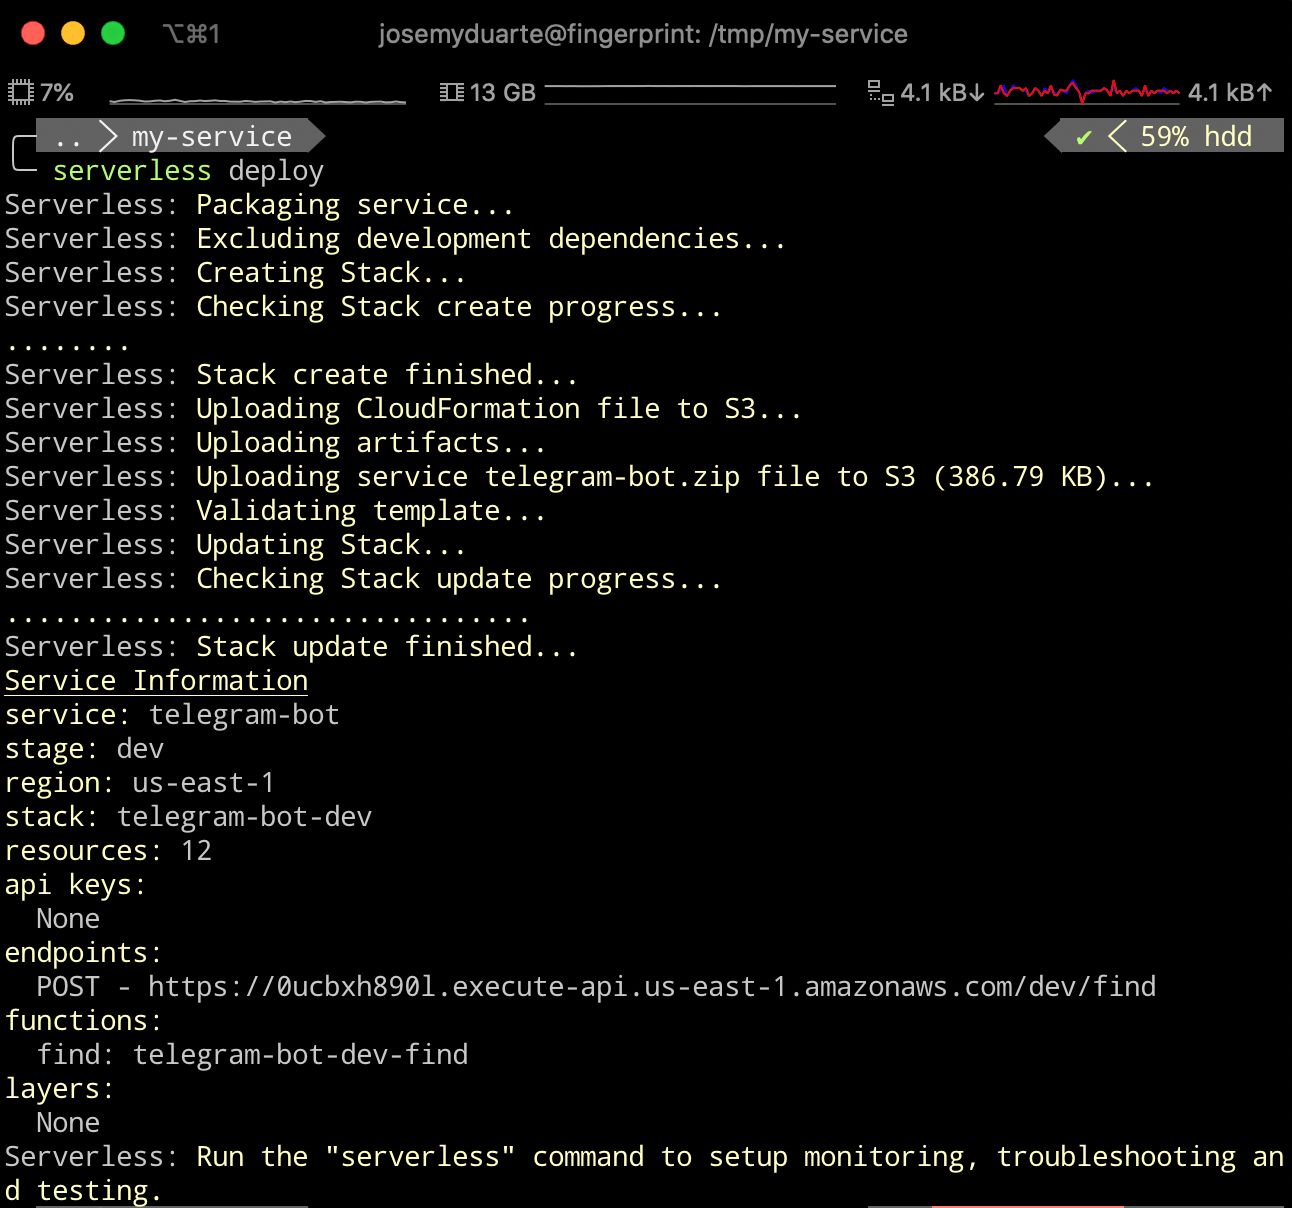
That is everything that we need to execute to have our code in AWS. Now we could change the Ngrok URL for this one and everything should work without problems.
And to clean everything in our AWS account just run serverless remove.